The app intro and turning on reminders
What the draggable welcome hero and the first-run intro carousel show you, and how to turn reminders on later from Settings.
The first time you open Limbo you get two quick moments before you land on Home: a playful welcome hero, then a short intro carousel. Neither asks you to set anything up: no permission prompts, no forms. You tap through and you're in.
Everything here is personal to your account, no organizer or owner powers are involved. Both screens show once, then never again.
The welcome hero
Before you sign in, Limbo opens on a single frosted-glass bubble resting at the bottom of the screen, with a Swipe up to begin hint underneath it.
- Drag the bubble upward. It stretches like liquid glass, snaps free of the bottom edge, and floats up to settle on the Limbo logo in the middle of the screen.
- The copy reveals as it lands: destination stamps stream up past the logo, and the headline appears: Meet Limbo, the ballot box for group trips, propose, vote, and let the deadline decide.
- Tap Get started to move on to signing in or creating your account.
The bubble stays live after it lands, you can grab it and fling it around while you read. It's just there for fun; nothing on this screen changes any settings.

Note
The welcome hero shows once per install, before you log in. If you've already been through it on this device, you'll go straight to the login screen instead.
The intro carousel
The first time you reach Home on a brand-new account, Limbo runs a short, swipeable intro: five screens that show what the app actually does: the reveal when a ballot closes, a sealed ballot mid-vote, voting from a no-install web link, your trip itinerary, and shared expenses.
- 1Swipe left to move through the five screens, or tap Next.
- 2Tap Skip in the top corner any time, you won't miss anything you can't find later.
- 3On the last screen, tap Start your first trip to open the new-trip form and land on Home.
Note
The intro carousel only runs once, for new accounts. It doesn't ask for notification permission, a date format, or your email, that all lives in Settings now, and you can get to it whenever you like.
Turn reminders on later
Because the intro no longer includes a reminders step, notifications stay quiet until you switch them on. In a voting app that matters: a crew member who never sees the "ballot closing" nudge is a crew member who doesn't vote. If you do one bit of setup after your first trip, make it this.
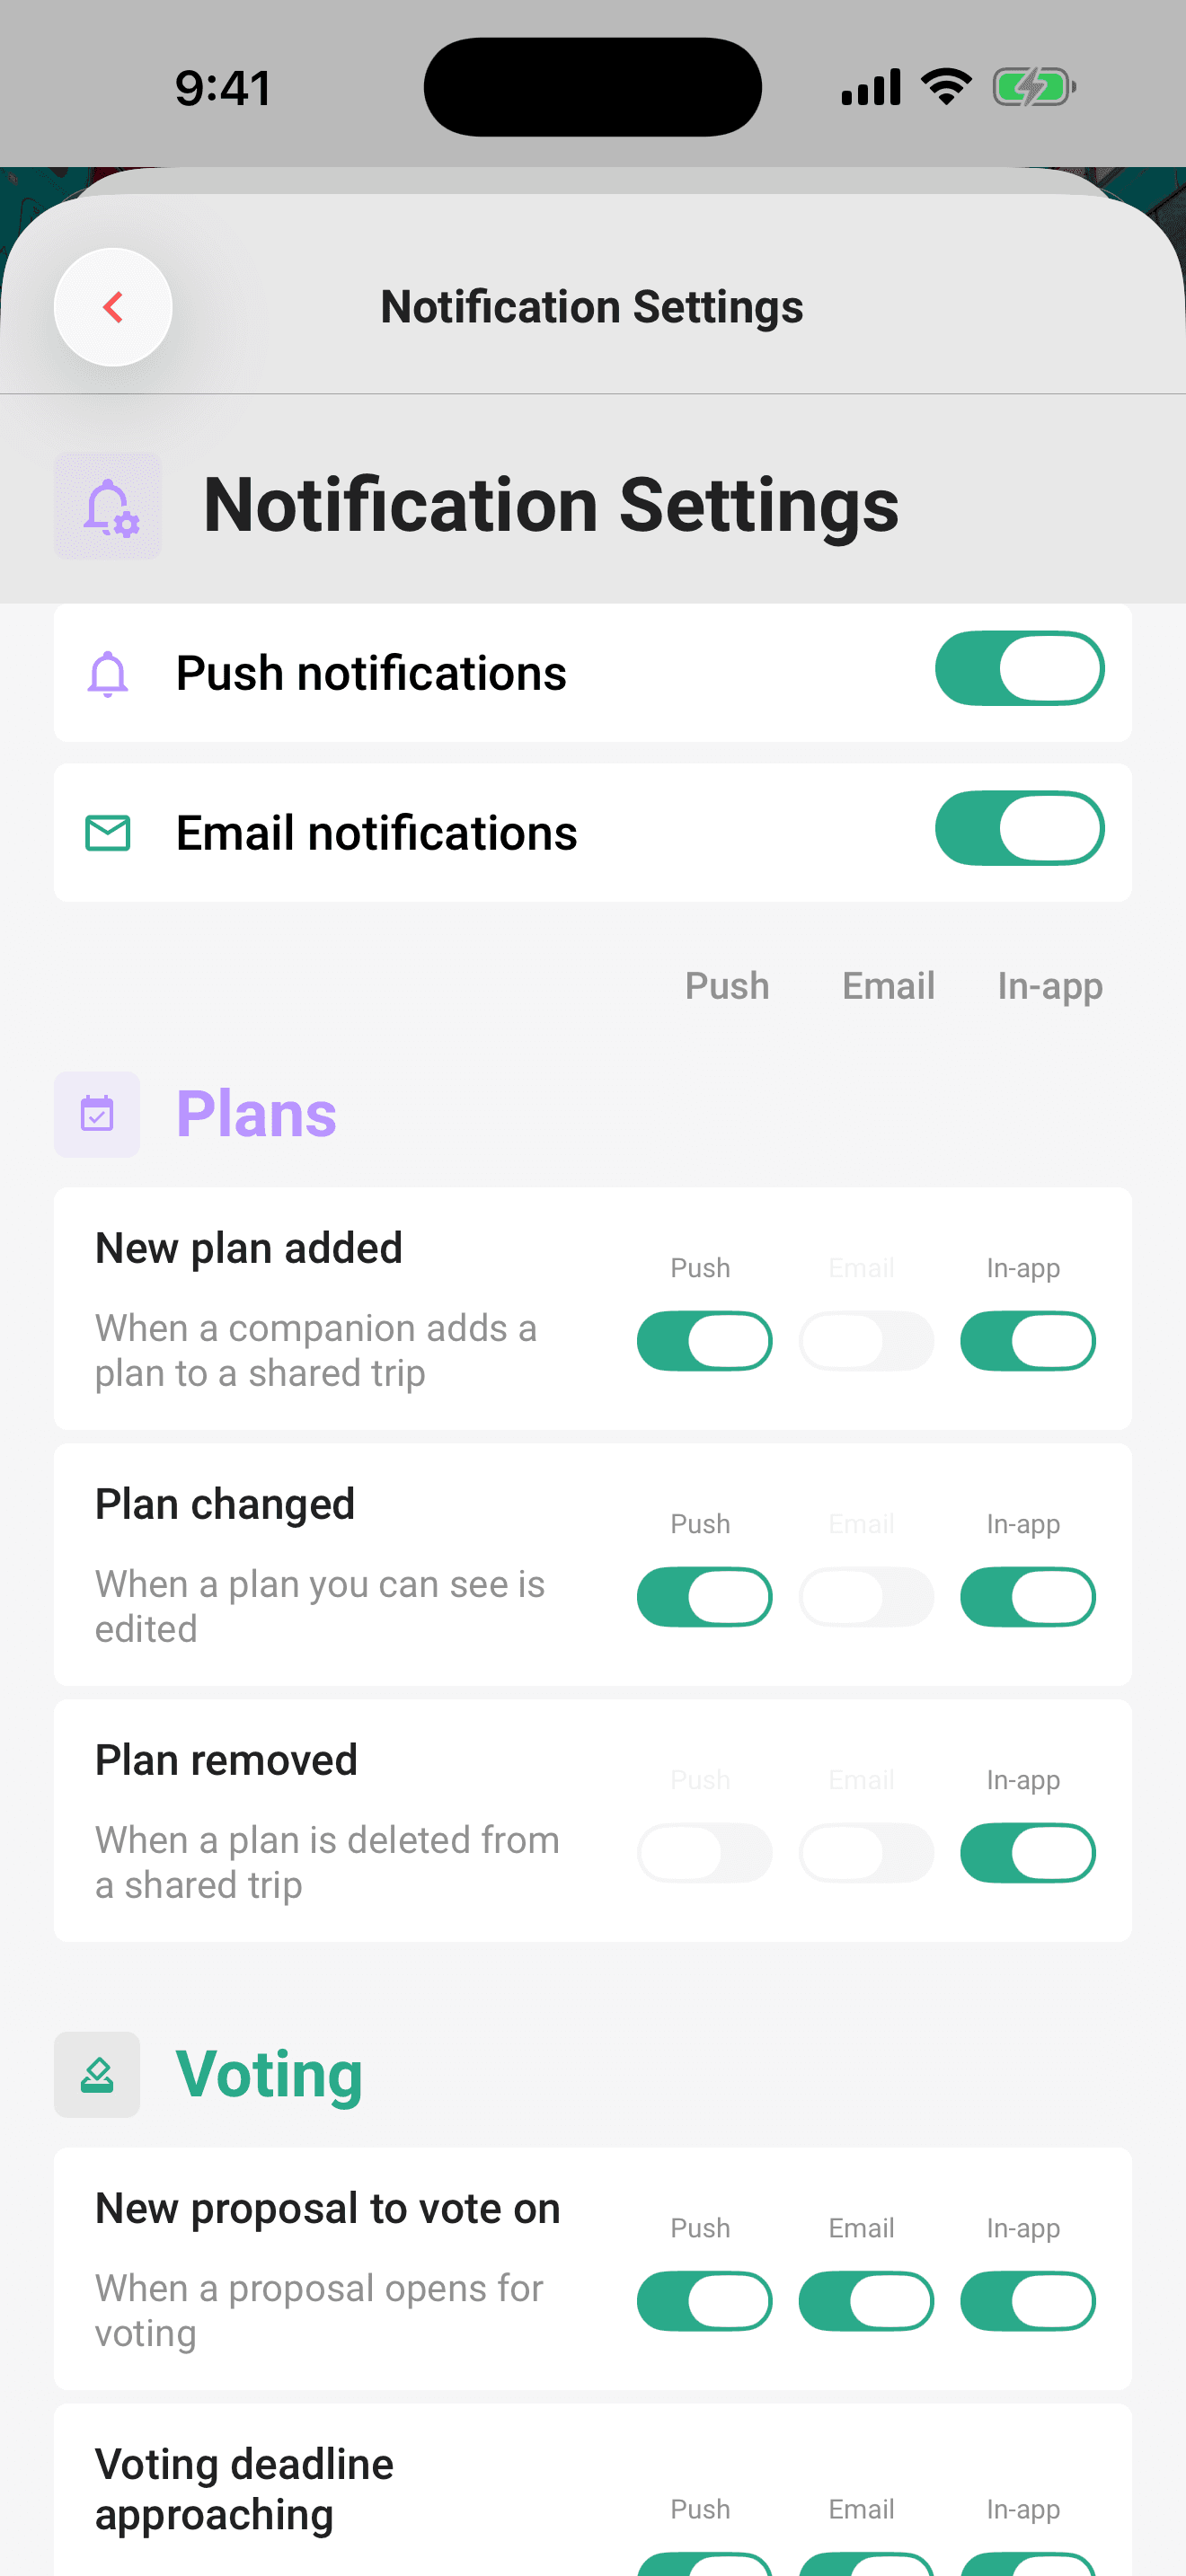
Limbo only asks your device for push permission when the push master switch turns on. Opening the settings screen alone never triggers the prompt.
- 1Tap your avatar on Home to open Settings.
- 2Open Notification Settings.
- 3Turn on the Push notifications master switch and tap Allow on the system prompt.
If you declined the system prompt in the past, your device won't show it again, you'll need to allow notifications in your device settings instead:
Open the Settings app, find Limbo, tap Notifications, and turn on Allow Notifications. Then return to Limbo and check the Push notifications master switch is on.
Note
The trip chat helps you out here too: if pushes are blocked at the device level, it shows an alert with a Settings shortcut that jumps straight to the right system screen.
For choosing exactly which events reach you on which channel, push, email, or in-app, per notification type, see Notifications.
Related articles
Create your account and log in
Sign up with email, Apple, or Google, sign in with a one-time email code, verify your email, plus password resets, logging out, and deleting your account.
Notifications: the bell, the inbox, and your settings
Where notifications land, where tapping one takes you, and how to control push, email, and in-app alerts per type.
Plan your first group trip
The full walkthrough: create your account, set up a trip, invite your crew, propose plans, and run your first sealed vote.